- If your domain is registered at a host that supports Domain Connect, you can provide your credentials to the Microsoft 365 Add domain wizard and click Verify. Microsoft will automatically configure the necessary domain records and complete the entire DNS setup for you. You can also select More options to see all of the potential verification methods available, as shown in Figure 1.7:
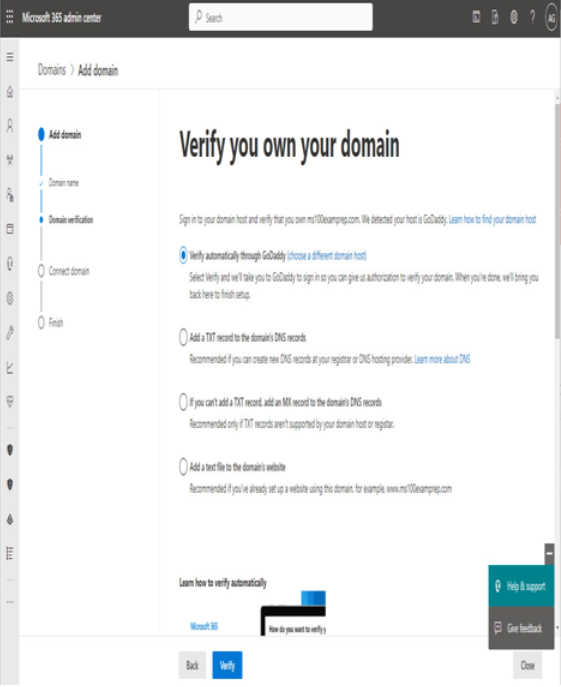
Figure 1.7 – Verify domain ownership
- If you choose any of the additional verification options (such as Add a TXT record to the domain’s DNS records), you’ll need to manually add DNS records with your DNS service provider. Microsoft provides the value configuration parameters necessary for you to configure DNS with your own service provider. After entering the values with your service provider, you can come back to the wizard and select Verify, as shown in Figure 1.8:
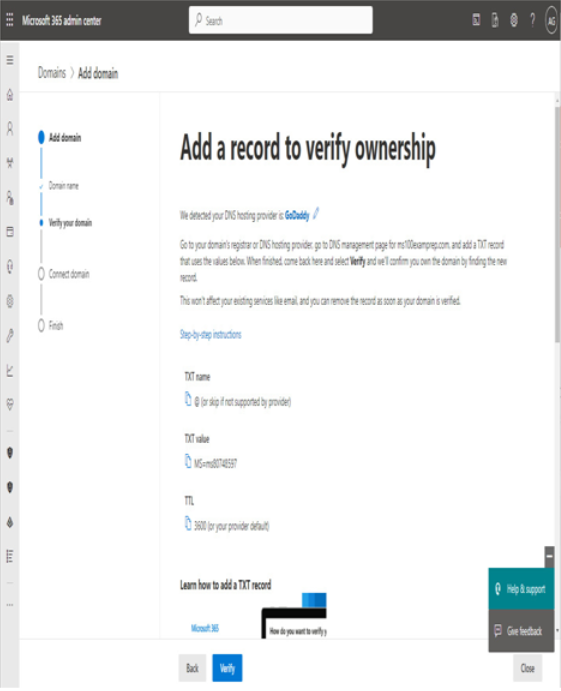
Figure 1.8 – Completing verification records manually
- If you’re using Domain Connect, enter the credentials for your registrar. When ready, click Connect.
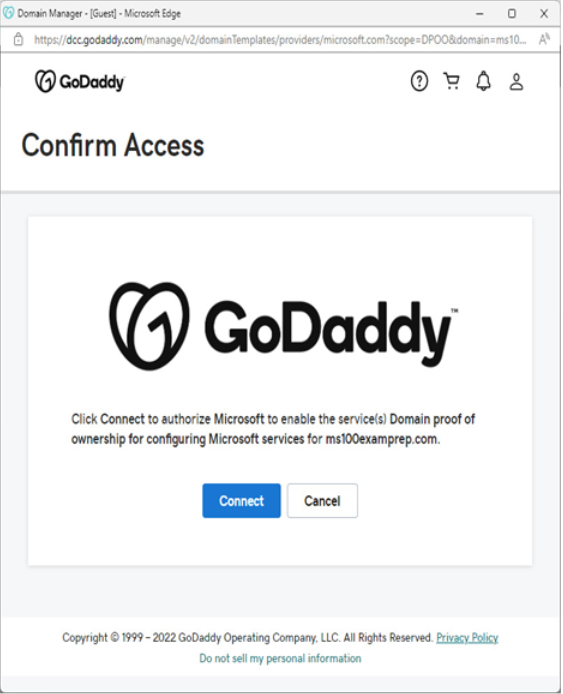
Figure 1.9 – Authorizing Domain Connect to update DNS records
- Select Let Microsoft Add your DNS records (recommended) to have the Microsoft 365 wizard update your organization’s DNS records at the registrar. However, if you are going to be configuring advanced scenarios such as Exchange Hybrid for mail coexistence and migration or have other complex requirements, you may want to consider managing the DNS records manually or opting out of select services. Click Continue.
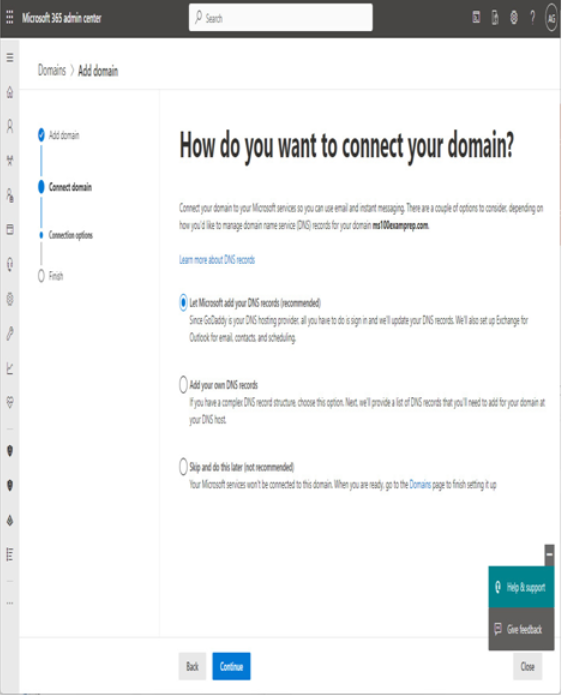
Figure 1.10 – Connecting domain to Microsoft 365
- Choose whether to allow Microsoft to add DNS records. Expand the Advanced options drop-down:
- The first checkbox, Exchange and Exchange Online Protection, manages DNS settings for Outlook and email delivery. If you have an existing Exchange Server deployment on-premises (or another mail service solution), you should clear this checkbox before continuing. You’ll need to come back to configure DNS settings to establish hybrid connectivity correctly. The default selected option means that Microsoft will make the following updates to your organization’s DNS:
- Your organization’s MX record will be updated to point to Exchange Online Protection.
- The Exchange Autodiscover record will be updated to point to autodiscover.outlook.com.
- Microsoft will update your organization’s SPF record with v=spf1 include:spf.protection.outlook.com -all.
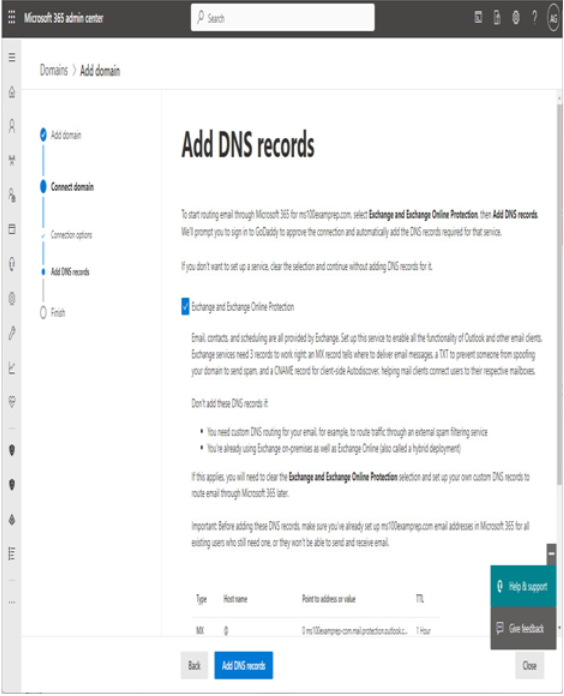
Figure 1.11 – Adding DNS records
- The second setting, Skype for Business, will configure DNS settings for Skype for Business. If you have an existing Skype for Business Online deployment or you’re using Skype for Business on-premises, you may need to clear this box until you verify your configuration:
- Microsoft will add two SRV records: _sip._tls.@ and _sipfederationtls._tcp@.
- Microsoft will also add two CNAMEs for Lync: sip. to point to sipdir.online.lync.com and lyncdiscover. to point to webdir.online.lync.com.
- The third checkbox, Intune and Mobile Device Management for Microsoft 365, configures applicable DNS settings for device registration. It is recommended to leave this enabled:
- Microsoft will add the following CNAME entries to support mobile device registration and management: enterpriseenrollment. to enterpriseenrollment.manage.microsoft.com and enterpriseregistration. to enterpriseregistration.windows.net.
- Click Add DNS records.
- If prompted, click Connect to authorize Microsoft to update your registrar’s DNS settings.
- Click Done to exit the wizard or View all domains to go back to the Domains page if you need to add more domains.
You can continue adding as many domains as you need (up to the tenant maximum of 900 domains).
ADDING A DOMAIN DEEP DIVE
To review alternative steps and more information about the domain addition process, see https://learn.microsoft.com/en-us/microsoft-365/admin/setup/add-domain.